

 Jun 20 2010, 01:35 PM

 ..dun want to mess things in 2nd post, so this post i dedicated for :
BenQ S42 Dissecting
Read step by step, and do it on your own risk (warranty is VOIDED when you do this
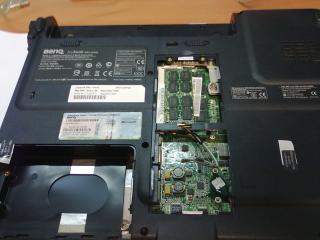
)1. Remove 2 screws on RAM module cover; take out rams, disconnect the 3 pins of wireless LAN antenna (remember the order which is black white grey from top to bottom), remove 2 screws that secure the wireless lan card and take the card out,
2. Remove 2 screws on HDD (one of which is covered with a seal in my case) bay cover and remove the HDD bay cover, remove 2 screws that secure the HDD and take out HDD
3. Remove 1 screw that secures the optical drive and take out the optical drive, you'll see this :
4. Remove all the remaining screws on the bottom, 12 if I didn't count wrong, remove the battery, remove another 2 ordinary screws and 3 flat screws under battery,
5. Remove 4 screws on the back of the laptop (2 on each side of the screen hinges),
6. Put the laptop in normal position, open the lid all the way to the back. Now uncover the hinge cover from the right end (the long piece with power button), use some steady force if needed, after which you'll see this:

7. Lift keyboard from top, under the keyboard unplug the keyboard cable, remove the keyboard; disconnect the LCD cable (top left), pull out the wireless LAN card antenna cables (black/white/gray) unplug the touchpad cable and another cable (the two in the middle with blue plastic cover) :

8. You can remove the 4 screws that secures the lid to the main chassis but that's not necessary; now remove the 3 screws under the keyboard, turn the back of the laptop towards you, then you can lift up the top cover of the main chassis (remove the lid may make this step a little easier) to reveal the mainboard, disconnect the plug near the touchpad which shall be the speaker cable,
9. Turn the opened main chassis in normal position, with the mainboard on the left half of the chassis, disconnect the bluetooth cable on bottom left, USB cable near HDD bay, and power cable on top left corner, remove 2 screws on top and bottom of the mainboard then you can take out the mainboard (remove the lower part where the audio jack is first, then slide it out from left), The empty bottom chassis looks like this:
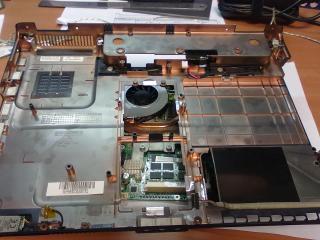
10. The mainboard looks like the picture below. to remove the cooling system, unscrew the 4 screws on CPU/chipset heatsink, and 2 screws on GPU heatsink. These 6 screws are fixed on heatsink so don't force to take them out. then remove 1 last screw on top of fan. Now the cooling assembly can be take out from mainboard.
11. Clean the vent on the bottom of main chassis; clean the fan and vent with vacuum or compressed air if there are dusts.


12. I forgot to take picture when I first opened up the laptop. So what you see from the final picture is after I remove the thermal pad on GPU. I put a small aluminum pad in between GPU and heatsink (the shining silver pad shown on the heatsink) with thermal paste (OCZ freeze) on both sides.
Remark: when I fist open up the heatsink assembly, the two yellowish plastic bands near the top VRAM chips actually covers the chip and the thermal pad is not in direct contact with the chips. That's what make me think that the VRAM chip may not have a big heat issue, so I didn't replace those thermal pads with metal pads.

~~credits to mangos47 @NBR
This post has been edited by miahahaha: Jun 28 2010, 08:50 AM
 Quote
Quote


 ..
..
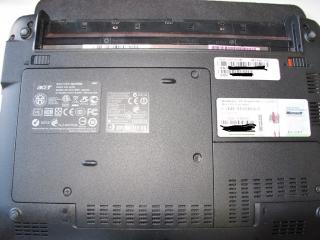
 ..that one is Acer Aspire One
  ..see, which mobo HP Mini use
  ..that Dell coupon is useful info


 0.0296sec
 0.47
0.47
 6 queries
 GZIP Disabled