

 .sk8roy,can u plz make 1 detailed worklog so dat anyone can use it as a guide should they wanna try d same thing?
HTPC Wood Case, media center scratch build
|
|
 Mar 11 2010, 07:43 PM Mar 11 2010, 07:43 PM
|
 
Junior Member
253 posts Joined: Jan 2003 |
Wow,dat's damn nice
.sk8roy,can u plz make 1 detailed worklog so dat anyone can use it as a guide should they wanna try d same thing? |
|
|
|
|
|
Mar 15 2010, 03:06 AM
|

Senior Member
853 posts Joined: Sep 2008 |
wow
very nice casing the wooden colour very kewl |
|
|
Mar 15 2010, 06:19 PM
|
|
Junior Member
33 posts Joined: Oct 2009 |
QUOTE(Arool @ Mar 11 2010, 07:43 PM) Wow,dat's damn nice .sk8roy,can u plz make 1 detailed worklog so dat anyone can use it as a guide should they wanna try d same thing?  I will be redoing the front of the case next week hopefully (waiting on some more wood). When I do I will take some more pics and try explaining more in detail what I did with the rest of the case as well as the new front... |
|
|
Mar 18 2010, 09:48 PM
|

Senior Member
1,148 posts Joined: Jan 2009 |
lolz..... NICE CASE! imma build one myself also! xD recycle old wood and furniture old part!
|
|
|
Mar 18 2010, 10:52 PM
|

Senior Member
1,115 posts Joined: Nov 2006 From: ....... |
fuhhh....really nice done...really look like a drawer xD...u guys really have the cr8tivity..i wish i hve one
 |
|
|
Mar 18 2010, 11:54 PM
|
|
Junior Member
253 posts Joined: Jan 2003 |
QUOTE(sk8roy @ Mar 15 2010, 06:19 PM) I will be redoing the front of the case next week hopefully (waiting on some more wood). When I do I will take some more pics and try explaining more in detail what I did with the rest of the case as well as the new front... Thnx man.ur work IMO is really outstanding n unique.i hope u can make it easy n noob frenly (yours truly  ).surely a lot will make it as guidance.looking forward to it ).surely a lot will make it as guidance.looking forward to it  Added on March 19, 2010, 12:01 amOh,n plz include d reasons why u choose each hardware.u know,mybe cuz low heat,energy efficien or whatever.thnx. This post has been edited by Arool: Mar 19 2010, 12:01 AM |
|
|
|
|
|
Mar 19 2010, 01:26 AM
|

Senior Member
1,430 posts Joined: Jul 2009 |
Don't you wanna try woodcase with transparent sidepanel or something? So we can see your rig inside and put CCFL some more
 |
|
|
Mar 20 2010, 11:40 AM
|
|
Junior Member
33 posts Joined: Oct 2009 |
QUOTE(hafizul88 @ Mar 19 2010, 01:26 AM) Don't you wanna try woodcase with transparent sidepanel or something? So we can see your rig inside and put CCFL some more when I do my next pc, I think I will make it out of wood again. If I do then yes will do some windows and what not to show off the inside. This build however sits in my entertainment stand and cannot be seen except for the front. Also the insides are sorta plain, no sleeving, lights, or even attractive components worth showing off or highlighting with a window. Another update, will be another week before I can reveal my facelift. Seems the piece of wood I ordered is 1/4 inch too short. I guess that's why its best to measure instead of trying to go by memory, I was too lazy to find a tape measure..... |
|
|
Mar 21 2010, 12:54 AM
|
|
Senior Member
1,430 posts Joined: Jul 2009 |
QUOTE(sk8roy @ Mar 20 2010, 11:40 AM) when I do my next pc, I think I will make it out of wood again. If I do then yes will do some windows and what not to show off the inside. This build however sits in my entertainment stand and cannot be seen except for the front. Also the insides are sorta plain, no sleeving, lights, or even attractive components worth showing off or highlighting with a window. Make sure you post the picture of your progress. Really like to seeAnother update, will be another week before I can reveal my facelift. Seems the piece of wood I ordered is 1/4 inch too short. I guess that's why its best to measure instead of trying to go by memory, I was too lazy to find a tape measure..... |
|
|
Mar 25 2010, 12:12 AM
|

Junior Member
329 posts Joined: Feb 2008 From: sHiRe |
and mod the optical drive front panel ooo.... not yet right?? really looking forward....
|
|
|
Mar 26 2010, 02:14 PM
|
|
Junior Member
33 posts Joined: Oct 2009 |
Ok, finally received my wood. Here is the start of my facelift. To start I had to cut the african padauk board down to size and also cut the oak 1" square down to size.
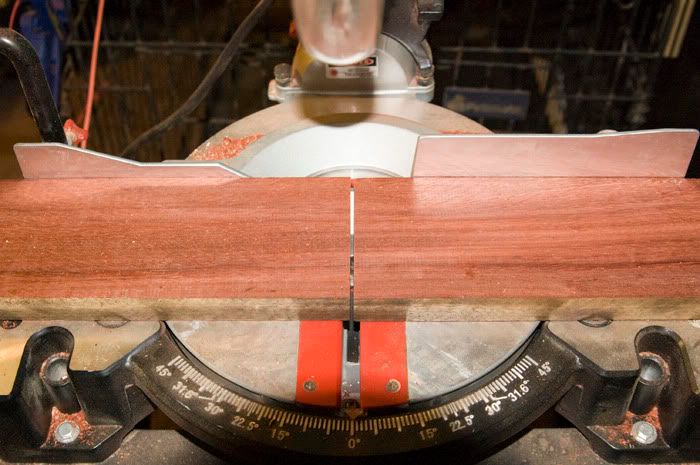 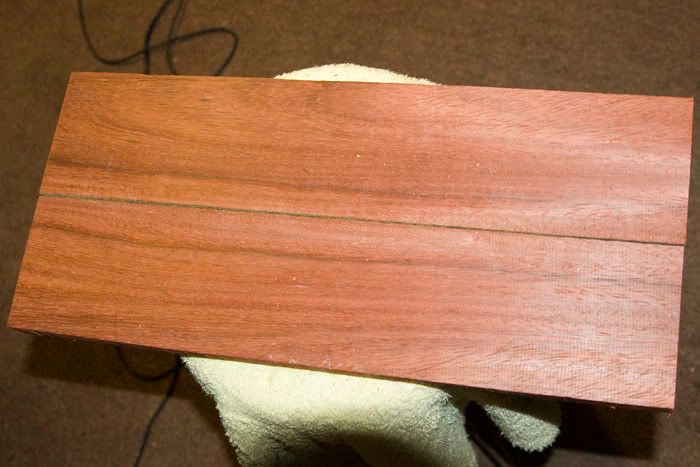 Here is the apple dvd drive door that I will be using to accomplish this mod. I will be adding a piece of oak veneer to the face of this so it blends with the rest of the wood. 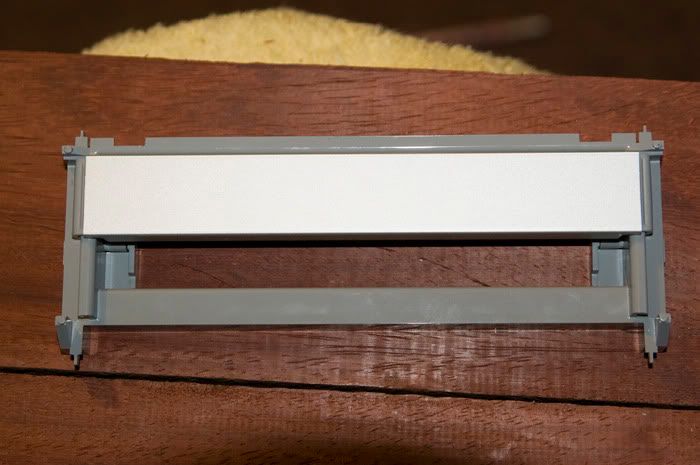 Shot of it all to give an idea of how it will go together. Of course the backside will be routed out 1/2 -3/4 inch so the dvd drive door will sit much closer to the face, almost flush. 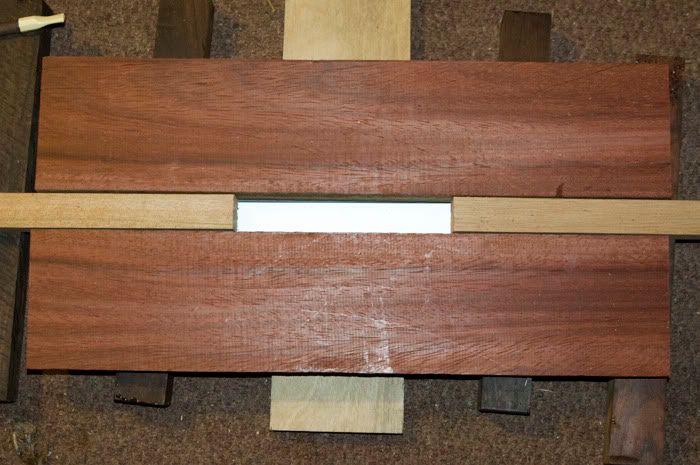 And now glued together, I'll have to wait a day for it to dry completely. Will give another update Saturday. I plan on doing the rear panel Saturday also, so hopefully I can share that too... 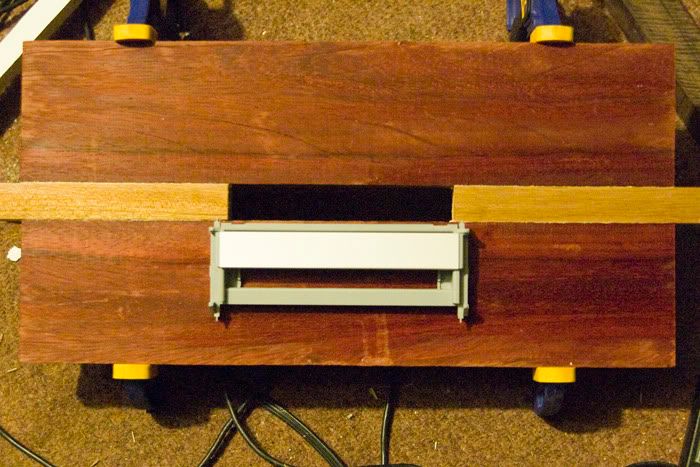 |
|
|
Mar 29 2010, 12:06 PM
|
|
Junior Member
329 posts Joined: Feb 2008 From: sHiRe |
QUOTE(sk8roy @ Mar 26 2010, 02:14 PM) Ok, finally received my wood. Here is the start of my facelift. To start I had to cut the african padauk board down to size and also cut the oak 1" square down to size. TS, r u a carpenter?? or u do home furniture reno???Here is the apple dvd drive door that I will be using to accomplish this mod. I will be adding a piece of oak veneer to the face of this so it blends with the rest of the wood. Shot of it all to give an idea of how it will go together. Of course the backside will be routed out 1/2 -3/4 inch so the dvd drive door will sit much closer to the face, almost flush. And now glued together, I'll have to wait a day for it to dry completely. Will give another update Saturday. I plan on doing the rear panel Saturday also, so hopefully I can share that too... |
|
|
Apr 1 2010, 06:25 PM
|

Junior Member
127 posts Joined: Oct 2009 |
walao.. sibeh nice weh. are you making another one for sales? i'm interested
 |
|
|
|
|
|
Apr 1 2010, 07:42 PM
|

All Stars
10,530 posts Joined: Nov 2004 From: Petaling Jaya & Mid Valley |
@valtai30
u quoted ALL those pictures just to ask a simple question???  at least spoiler them la aiyo... at least spoiler them la aiyo...TS...hows about some updates? ur glue would have dried by now |
|
|
Apr 2 2010, 01:21 AM
|

Senior Member
2,367 posts Joined: Oct 2008 From: Penang / Selangor |
ya,update,update!!
 |
|
|
Apr 2 2010, 08:24 PM
|
|
Junior Member
33 posts Joined: Oct 2009 |
Yes the glue has dried...lol....Sorry I have not had a chance to update, will get something up tomorrow. Been busy with work, put 14 hours in yesterday. Off tomorrow so will get this updated.
And yes you could say I am a carpenter/furniture builder. It is not my job but a hobby of mine. I built every cabinet in my kitchen when I remodeled it and a couple entertainment stands and a few other odds and ends. |
|
|
Apr 2 2010, 08:58 PM
|

Senior Member
539 posts Joined: Jan 2007 From: Cuba |
just go laminate the dvd rom door to wood pattern then all be done.
http://forum.lowyat.net/topic/1160674 This post has been edited by easyzuddin: Apr 2 2010, 08:59 PM |
|
|
Apr 2 2010, 10:55 PM
|

Senior Member
939 posts Joined: Jun 2009 From: ~~ GGTherapy ~~ |
MAMAMIA... this is great piece of work there
|
|
|
Apr 3 2010, 10:36 AM
|
|
Junior Member
33 posts Joined: Oct 2009 |
QUOTE(easyzuddin @ Apr 2 2010, 08:58 PM) just go laminate the dvd rom door to wood pattern then all be done. Read my mind, that is what I did. Here is an update.http://forum.lowyat.net/topic/1160674 After gluing the wood, I started routing a groove for the dvd door to sit in the face. I said I would post detail of this part but there was just too much dust and my Nikon is my baby, I did not want to expose it to all the dust. So here are a few more shots of it finished and tomorrow I will open the case and get some shots of the inside of the front and explain what I did. Here is a shot of the PC in its spot on the entertainment stand. Excuse all the mess....should have cleaned it up a bit before the pic..Also this is the best TV show ever...Any Dexter fans out there. 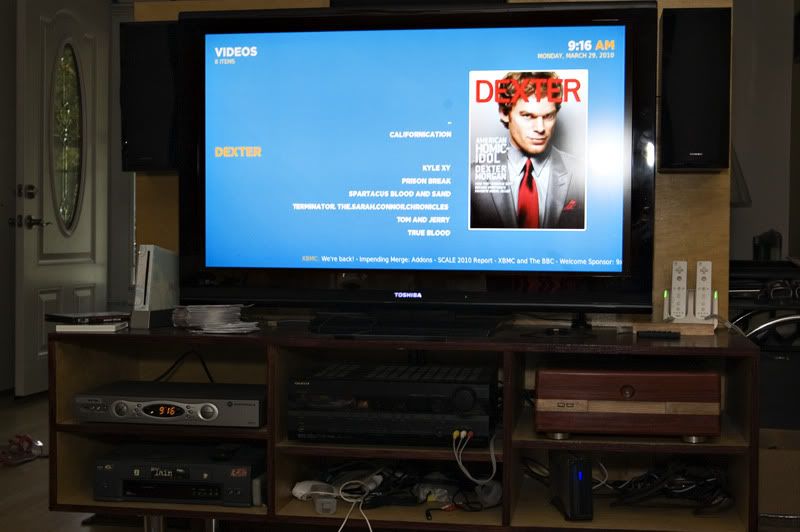 And now a close up of the new facelift. The wood stripe doesn't quite flow together pefectly, the grain is a tad off but this looks so much better than the ugly DVD drive. 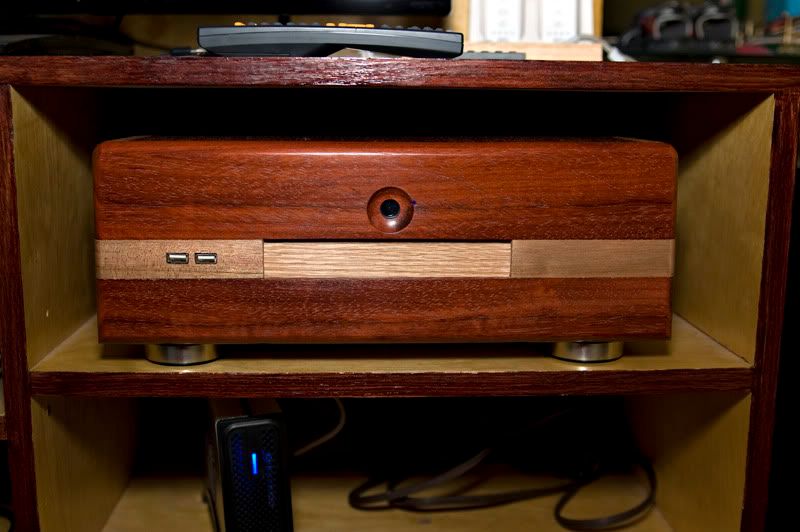 As you can see there is no eject button or power buttons on the PC. Everything is controlled from the remote you see on the top in the picture above. Pc is running a custom mod of win 7 32bit done by AMC over at Project Alchemist called DeepBlue7. Takes about 7 seconds to start and automatically starts in XBMC. 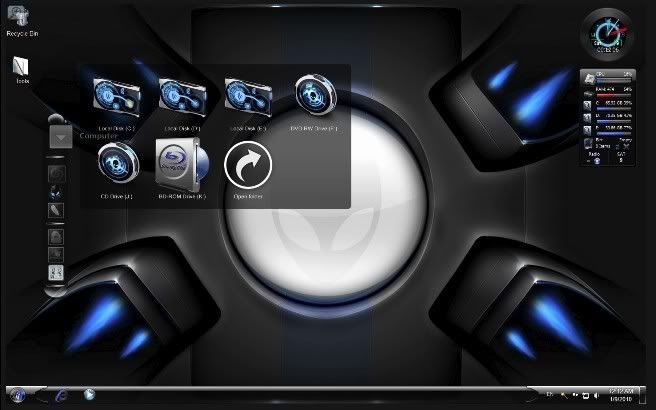 For those that do not know how the Apple G5 drive door works....A few pics...When the drive opens it runs into 2 curved tabs on the apple door that push and slide the door down and then the dvd tray slides out. It is spring loaded so when the drive closes it just pops back up. 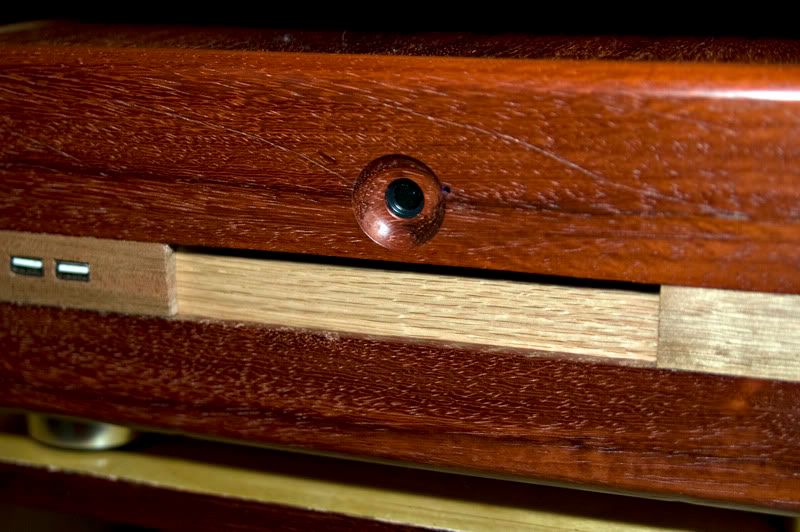 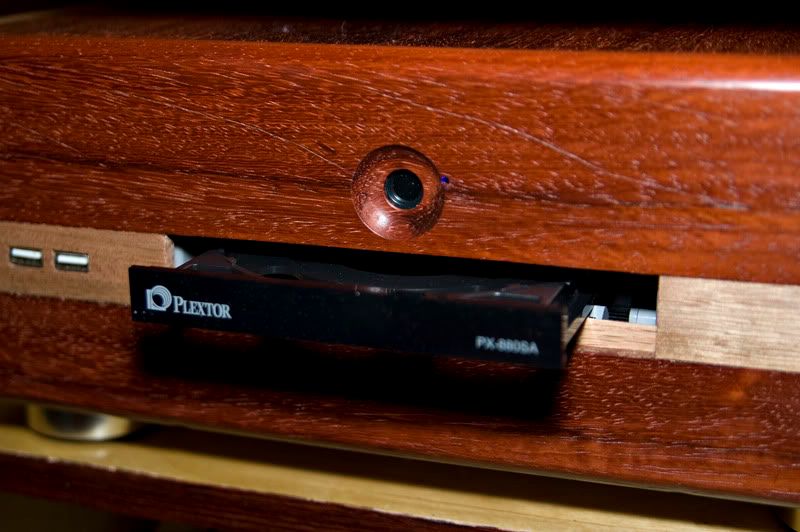 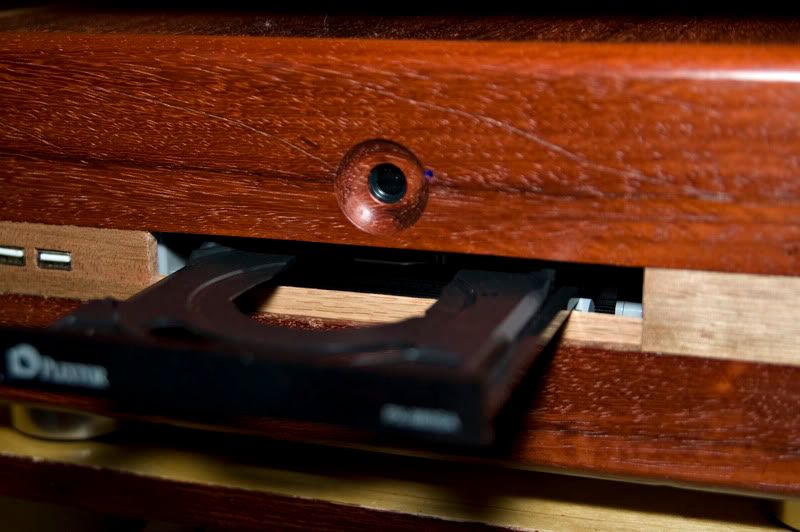 Thanks for taking a peek and commenting. I will get some more shots from the inside so anyone that wants to do something similar can have a better idea of how it all goes together. |
|
|
Apr 3 2010, 05:18 PM
|
|
Junior Member
115 posts Joined: Dec 2009 From: Kuala Lumpur |
Nice modding + nice photos
|
| Change to: |  0.0212sec 0.0212sec
 0.45 0.45
 5 queries 5 queries
 GZIP Disabled GZIP Disabled
Time is now: 22nd December 2025 - 08:29 AM |
 Quote
Quote