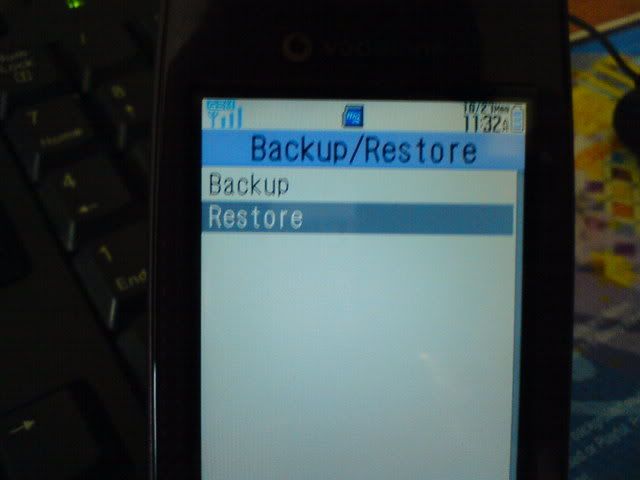
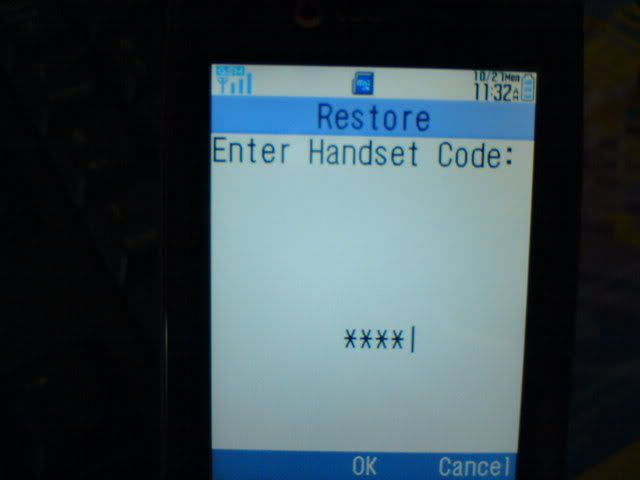
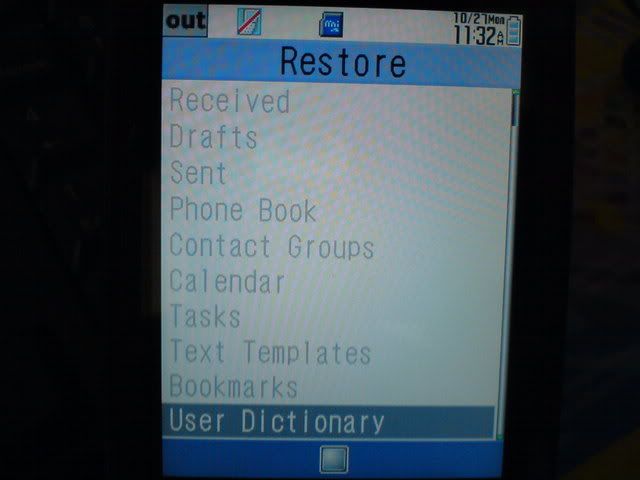
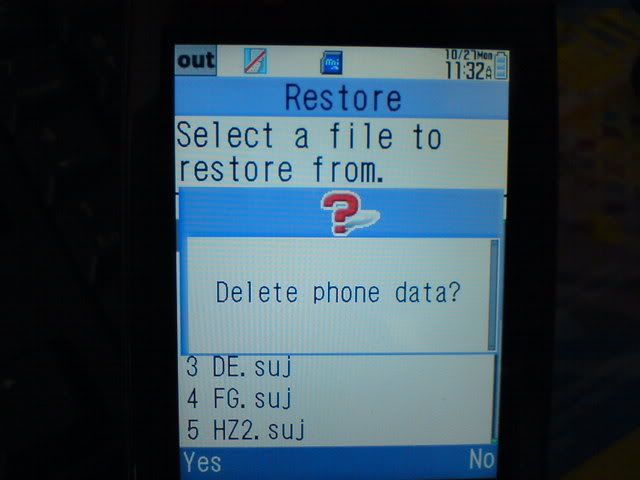
Tutorials (1)How to UPLOAD stuffs to your DOCOMO keitai (Credit to bro vodafone)
You could try to download the English manual from the Docomo website.
By the way, not sure the structure is same for SH905i, you could try this guide written for P905i:
» Click to show Spoiler - click again to hide... «
================================
Video Part
================================
Regarding putting video and audio into P905i for playback, please try the following:
For movie, please follow the naming convention and structure below:
o:\SD_VIDEO\PRLXXX\MOLYYY.ZZZ
You can copy and paste the video file into the above structure.
You can create sub-folder for separating the movies but the name must be in PRLXXX
The file name must be in MOLYYY.ZZZ .You can't use your own naming on the file as the phone will not detect them.
Symbol Representation:
o = root location of the microSD card
XXX = number starting from 001 to 999
YYY = number starting from 001 to 999
ZZZ = the original file extension (could be MP4, 3GP, ASF)
Example:
o:\SD_VIDEO\PRL001\MOL001.MP4
o:\SD_VIDEO\PRL001\MOL002.MP4
o:\SD_VIDEO\PRL002\MOL010.ASF
o:\SD_VIDEO\PRL002\MOL011.3GP
o:\SD_VIDEO\PRL003\MOL001.ASF
================================
Music/Audio Part
================================
For music/audio, please follow the naming convention and structure below:
o:\PRIVATE\DOCOMO\MMFILE\MMFUUUU.ZZZ or sub-folders within MMFILE folder
Symbol Representation:
o = root location of the microSD card
UUUU = number starting from 0001 to 9999
YYY = number starting from 001 to 999
ZZZ = the original file extension (could be MP4, 3GP, ASF, SDV, WMA)
Example:
o:\PRIVATE\DOCOMO\MMFILE\MUD001\MMF0001.MP4
o:\PRIVATE\DOCOMO\MMFILE\MUD001\MMF0006.MP4
o:\PRIVATE\DOCOMO\MMFILE\MUD002\MMF0003.3GP
o:\PRIVATE\DOCOMO\MMFILE\MUD002\MMF0002.ASF
(Note that WMA is not tested yet but I guess you need USB cable to sync those WMA files to the phone under MTP mode via Windows Media Player)
For converting songs to listen in the phone, you can get iTunes + Quicktime from
http://www.apple.com/iTunes/ which is free to encode your songs into AAC files (which will be in .m4a extension). After that, rename the extension to .MP4 will do.
You can set the encoding option under iTunes via:
Edit -> Preferences -> Advanced Tab -> Importing Tab -> Choose AAC Encoder under Import Using dropdown list and use High Quality (128Kbps) on Settings dropdown list.
Drag some songs into iTunes. Choose one or multiple songs in the list and right click. Choose Convert Selection to AAC option and you will then start to convert those songs into AAC format.
================================
Contact Part
================================
If you want to insert contacts in .VCF (vCard file) to P905i, please do the following:
Make sure the following directory exist in your memory card:
x:\SD-PIM\
(x represents the drive letter for the memory card)
You must follow the following naming convention in order for the vCard file to be detected by the phone:
PIMXXXXX.VCF
X represents number from 00001 to 65535.
The vCard, vCalendar must store within SD-PIM folder.
If you have single vCard with multiple contacts, then this one will be best as you will only need to rename the VCF file once.
For example: Original vCard file name is My100Contacts.VCF. You need to rename it to PIM00001.VCF.
If you have multiple vCards with single contacts in each, then you will need to rename the file name one by one.
For Example:
My1stContact.VCF -> PIM00001.VCF
My2ndContact.VCF -> PIM00002.VCF
When you complete copying the VCF file into x:\SD-PIM\, insert the memory card into the phone.
Go to Menu -> LifeKit -> SD-PIM -> Phonebook
Now you will see the renamed VCF file(s) in the list. If you have a single VCF file with many contacts in it, just press the VCF file, and you can see all the individual contact in it. Press FUNC key to copy it to phone memory (one or all).
Small Tips: You can use Microsoft Outlook or Windows Live Mail to export your existing phonebook in PC into Business Card (.VCF)
Other tips: You may try the Docomo DataLink software for file transferring also.
(Credit to ryuuga)
» Click to show Spoiler - click again to hide... «
maybe this will help newcomers decide whether to get jphone or not ^^
PURPOSE:
to convert a short section of a SONG(yes the ones with voice and REAL guitar distortions, not the "crappy" MIDI sounds anymore) into MLD format to be used as ringtone in your jphone
BEFORE YOU BEGIN:
get and install
1)
wav2mld converter2)
AUDACITY (a free audio editor software)
HOW TO USE:
1) open audacity and load your song
2) cut a short section of a song(typically 20-24 secs) and export that short clip as wav format.
3) open wav2mld converter (click cancel when prompted to 'login')
4) drag your wav file into the program.
5) use these settings


This is the lowest sound quality settings but you are entitled to longer playing time.
you can set it to 32k but you will most probably get only 2 secs of the song xD
6) Click "make MLD" and you are done!!
To test the MLD, theres even an mld player together with the package you downloaded. Its called mfivoice.exe. Just launch up the file and drag your newly made MLD to the player to test what you have done. If you don't like it, you could always go back and do it again ^^
AND there you have it. It is now possible to play live recording audio files as ringtones on your jphone!! yipee!!
NOTE1: this has so far been tested on SH906i, P906i, P905i and confirmed working. Anyone else with different jphone models who got this to work please post it here.
NOTE2: I have never got to make the file more than 50kb(regardless of quality) i believe, if im able to manipulate the filesize, perhaps we will be able to get longer playing ringtones at better quality. Again, those with information kindly share it with us.
» Click to show Spoiler - click again to hide... «
✿。◕‿◕。✿
Let me introduce one of the best MMF converter. Support the MP3 and WAV file format and converted to MMF file format.
This is the link to get my software ㊣
☞ MMF Converter ☜Instruction for using this software:1→ Extract the file by using WinZip.
2→ Double click the setup.exe
3→ Install the programme to any directory as you like.
4→ Launch the programme.
5→ At the center there got a icon with MP3 and CD logo, click on it. ▼▼▼

6→ Import the music file, only support MP3 and WAV file format.
7→ Left click on the time line to start marking the sound click, right click to end the marking.
8→ Select confirm ( the maximum of output file not more than 200kb, so try to make your music file short and simple )
9→ A window will pop out, you may rename your file name, then click on "Save" button.
10→ Your MMF file has been save. Now you may enjoy to set your MMF file as your ringtone  Sample of the MMF file converted by using this programme☞ 稻香.mmf ☜
┈━═☆
xilisoft video converter
Super ConverterTotal Video Converter
Convert Video Tutorial (Credits to yupio)
» Click to show Spoiler - click again to hide... «
I m using xvid4psp version 5.0 too. And whether or not the output file larger or smaller than original file depends on your settings.
Manual says 640 x 480 because that's the max res the phone can support i think but you wont fill up the entire screen using that....use 640 x 352 for the best result then.
To encode / convert movie or video files to suit J-phones.
1. Download a freeware Xvid4PSP from :
HERE2. Install and follow the below steps.
Note : I've tried and tested many encoding software and found xvid4psp to be the best and easiest to use and its a pro software too for pro users. The main advantage is it can convert from almost any format (avi, mkv, etc) to quite a number of format. Originally developed for PSP device but now extended support many device. It can have the option to choose audio track (for multilingual source) as well as subtitles will be intact after conversion.
For xvid4psp v5.034 (other version may differ) :
Format : MP4
Denoise / Sharpen : Disabled
Brightness / Contrast : Disabled
Video Encoding : Custom****
Audio Encoding : AAC-LC ABR 128K
****Video Encoding Setting steps :
Open a video file u wanna encode
Video Encoding, choose : x264 Q21 Ultra
Click on 'E' to edit the detail settings
AVC Profile : Change to 'Baseline Profile'
At profile : Click '+' (add profile)
Put a new name to your saved profile like : Docomo
So you've saved yourself a video encoding profile, use this profile next time.
Now go to Top menu > Video > Resolution / Aspect
Set output resolution to 640 x 352
Click OK
Remember to do this for every new video file you open for encoding coz you cannot save this preference.
Done the resolution change settings.
Now Click Save, set the output destination. (You can now open other files and save again for queing of files to encode).
Finally Click 'Encode'.
Hope the above helps
Free wallpaper (Japanese website)Qube
Transfer WMA Musics + album arts by usingMTP Mode transfer method: (Credits to alvin_yong87 and HWZ forumers)
» Click to show Spoiler - click again to hide... «
Requirement: Windows Media Player 10/11
USB Cable
This is the easiest method, since all of us have WMP in our system. I’m using this method for my music as well.
Once you plugged in the USB cable & set the phone to MTP mode, WMP will automatically detect your phone (see pic below) & ready to sync.

You will need to convert your song collection to WMA before dumping them to WMP library.
WMA codec is the following:
- Choose WMA 9.2 /Lossless.
- Either VBR or CBR is fine
- 192Kbps for best quality/size ratio.
Album Art - Highlight all the particular songs that you want to add cover to, then drag cover art picture into the square next to the songs (see pic above).
- Another method, highlight all the particular songs, right click & select "Advanced Tag Editor", go to "Pictures" and add your album cover there. Choose "Cover (front)" for the "Picture Type".
If the album art doesn't appear on the phone, it means the album art picture is not embedded correctly into the songs.
Go back to WMP library, right click on the song and choose "Advanced Tag Editor". Go to "Pictures" and make sure there's an album art there, also "Cover (front)" must be selected on the "Picture type".
And by the way, the graphic of the album art should be 200x200 resolution (as other resolution i haven't try yet, and perhaps you may try for larger resolution), file size of the album art should not be more than 25kb.
Click the “Start Sync” button at the lower right corner once you’ve dragged all your files into the phone.
After its done, disconnect the USB cable and fire up the music player on your phone.

This post has been edited by lkylyk: Jun 16 2009, 07:14 PM 

 Apr 16 2009, 12:17 AM, updated 16y ago


 Quote
Quote


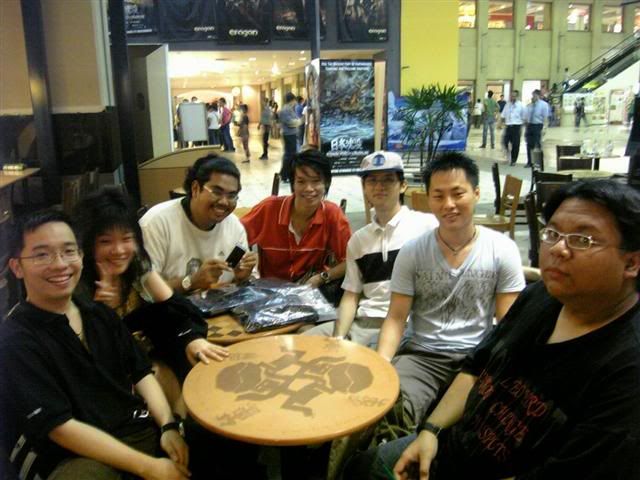


 (sonic_cd(left) and yesman(right) at the back)


 0.0284sec
 0.65
0.65
 6 queries
 GZIP Disabled